- For PC
- For MAC
- For Linux
- OS: Windows 10 (64 bit)
- Processor: Dual-Core 2.2 GHz
- Memory: 4GB
- Video Card: DirectX 11 level video card: AMD Radeon 77XX / NVIDIA GeForce GTX 660. The minimum supported resolution for the game is 720p.
- Network: Broadband Internet connection
- Hard Drive: 23.1 GB (Minimal client)
- OS: Windows 10/11 (64 bit)
- Processor: Intel Core i5 or Ryzen 5 3600 and better
- Memory: 16 GB and more
- Video Card: DirectX 11 level video card or higher and drivers: Nvidia GeForce 1060 and higher, Radeon RX 570 and higher
- Network: Broadband Internet connection
- Hard Drive: 75.9 GB (Full client)
- OS: Mac OS Big Sur 11.0 or newer
- Processor: Core i5, minimum 2.2GHz (Intel Xeon is not supported)
- Memory: 6 GB
- Video Card: Intel Iris Pro 5200 (Mac), or analog from AMD/Nvidia for Mac. Minimum supported resolution for the game is 720p with Metal support.
- Network: Broadband Internet connection
- Hard Drive: 22.1 GB (Minimal client)
- OS: Mac OS Big Sur 11.0 or newer
- Processor: Core i7 (Intel Xeon is not supported)
- Memory: 8 GB
- Video Card: Radeon Vega II or higher with Metal support.
- Network: Broadband Internet connection
- Hard Drive: 62.2 GB (Full client)
- OS: Most modern 64bit Linux distributions
- Processor: Dual-Core 2.4 GHz
- Memory: 4 GB
- Video Card: NVIDIA 660 with latest proprietary drivers (not older than 6 months) / similar AMD with latest proprietary drivers (not older than 6 months; the minimum supported resolution for the game is 720p) with Vulkan support.
- Network: Broadband Internet connection
- Hard Drive: 22.1 GB (Minimal client)
- OS: Ubuntu 20.04 64bit
- Processor: Intel Core i7
- Memory: 16 GB
- Video Card: NVIDIA 1060 with latest proprietary drivers (not older than 6 months) / similar AMD (Radeon RX 570) with latest proprietary drivers (not older than 6 months) with Vulkan support.
- Network: Broadband Internet connection
- Hard Drive: 62.2 GB (Full client)
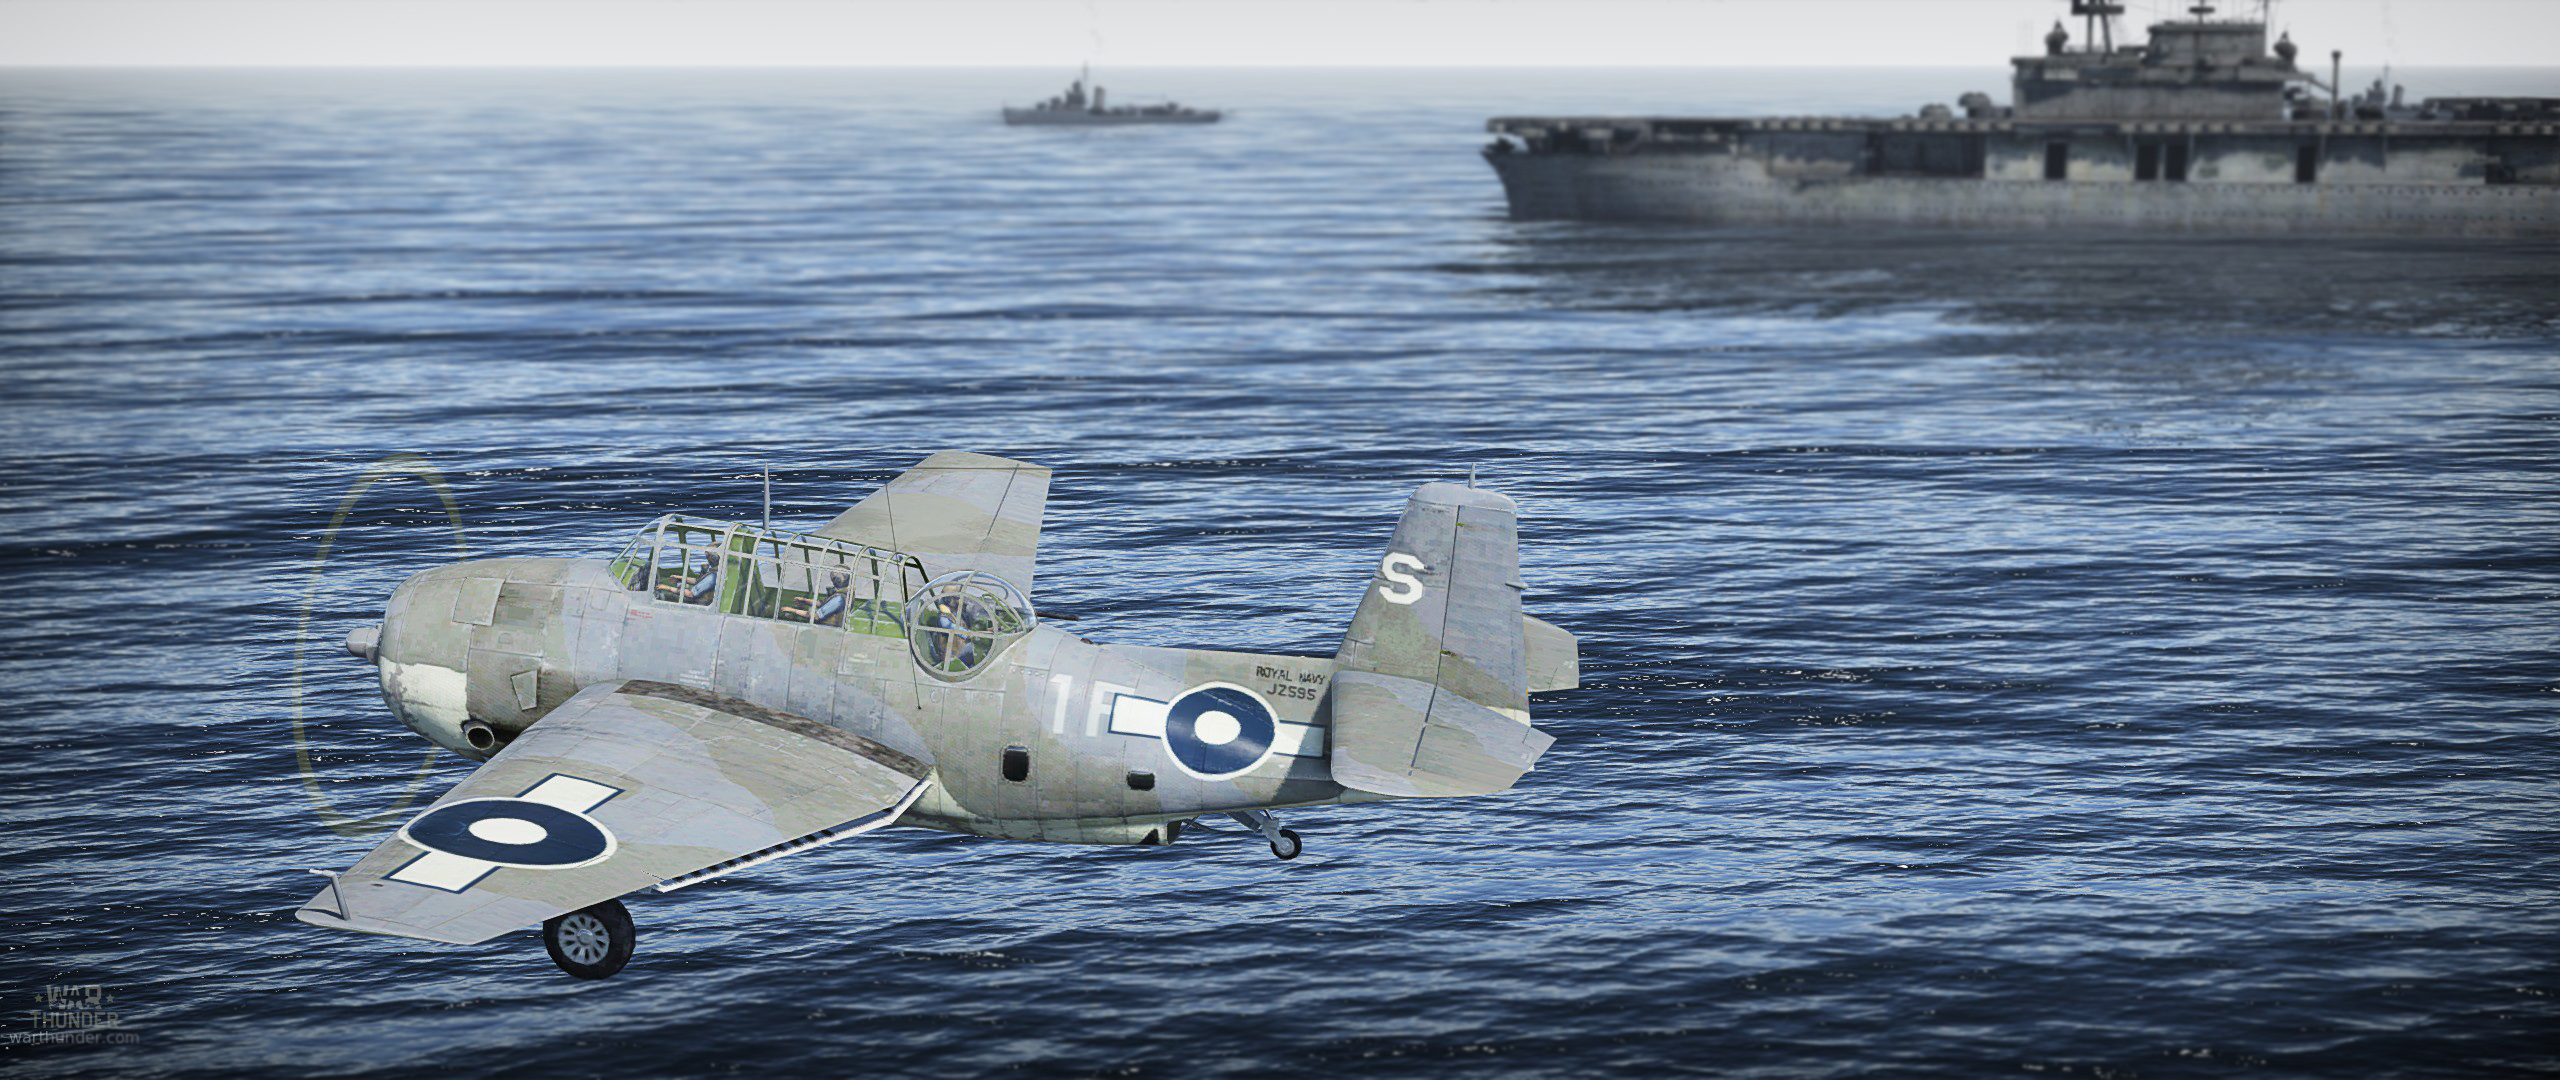
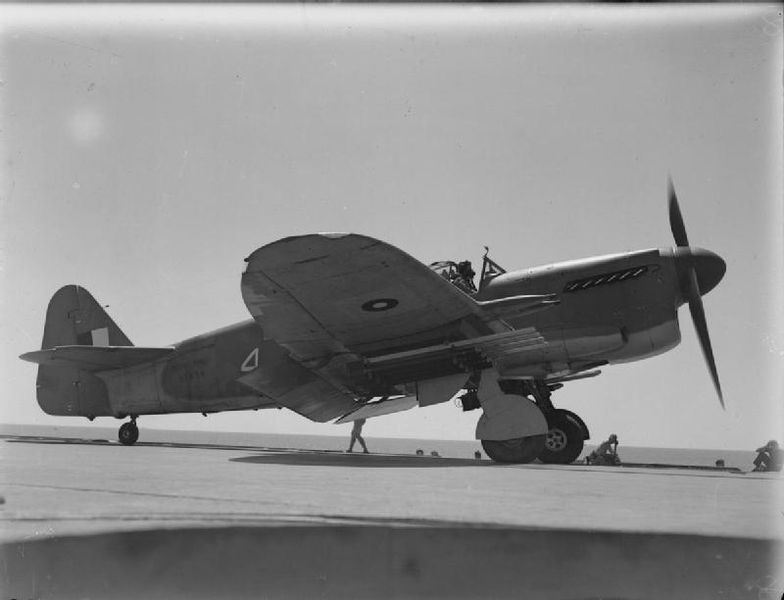
TBF Avenger (JZ595) of 820 squadron FAA based from HMS Indefatigable. Camouflage by Satsuki_Kiryuuin | Download here
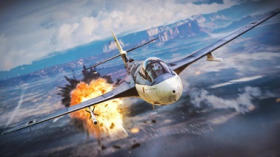
With nations across the entire globe weary of bloodshed, the tragedy of the Second World War was finally drawing to a close in August 1945. On August 15th, in the skies above Odaki Bay, a dogfight took place which many historians credit as being probably the last aerial combat of the Second World War.
.jpg) |
| Aerial view of Indefatigable at sea, 7 November 1944 |
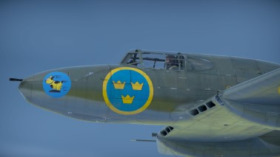
The British carrier HMS Indefatigable had been involved in operations in the Pacific theatre for several months. Contact with the Japanese was rare for the British naval pilots, although isolated dogfights did occur. Sub Lieutenant Richard Reynolds of 894 Naval Air Squadron shot down two A6M 'Zeroes' on April 1st 1945, and shared in the destruction of a third Japanese fighter three days later to make 'ace'. Aircraft of No.24 Wing had been heavily involved in keeping the kamikaze threat at bay throughout mid August, but this was in stark contrast to the previous weeks when sighting enemy aircraft was still a very rare occurrence. The Royal Navy Seafire pilots found themselves employed on patrol after patrol without any sign of the enemy. However, on August 14th orders were received to commence with offensive operations the next day.
An attack was planned against a Japanese airfield at Kisarazu; Fairey Fireflies were launched for a first strike at 0400, with a follow up planned by six Grumman Avengers. 887 and 894 Naval Air Squadrons were tasked with defending them. The aircraft launched and headed to the target: Sub Lieutenant Hockley flew the lead fighter of five Seafire LIIIs which flew close cover to the Avengers, whilst above them Sub Lieutenant Lowden led a further three Seafire FIIIs as top cover. The strike package encountered poor weather and, realizing that low cloud would obscure the target, changed course and headed towards their secondary target: a chemical factory at Odaki Bay.
With visibility increasing in clearer skies, a pair of A6M5s were sighted below the Fleet Air Arm formation. A brief exchange took place over the radios of the British aircraft and it was decided that these were probably a decoy intended to lure the Seafires away from the Avengers – the decision was made to continue to the target and look out for further Japanese fighters. During this conversation it was discovered that S/Lt Hockley’s radio had failed, and communication with the close escort leader was now severely hampered.
A cry of alert crackled through the headsets of the British crews as twelve Zeros (probably from the 302nd Kokutai and/or the 252nd Kokutai) dived down on the Seafires and Avengers from above and behind. The Seafire pilots jettisoned their external fuel tanks and turned to face the threat: all, except for Hockley who did not hear the call and, as lead aircraft, did not see his squadron mates break until it was too late – cannon fire smashed through his Seafire and he was forced to take to his parachute. He was executed by Japanese forces after capture.
 |
| A rocket-carrying Fairey Firefly of 1770 Squadron, Fleet Air Arm |
Lowden led his three Seafire FIIIs towards the dozen Zeroes, aware of the initial pair of Japanese fighters climbing up to join the fight. Hampered by their primary task of escorting the Avengers, outnumbered two to one after the loss of Hockley and suffering at the disadvantage of the Zeroes being above and behind, the situation looked grim for the Royal Navy fighter pilots.
Selecting his target, Lowden pressed his thumb against the fire button on the spade grip of his control column as he closed with one of the Zeroes. From a range of 800 yards, 20mm cannon shells impacted the target until, at about 450 yards, the Zero fell away in flames. Checking he was clear before latching onto a second target, Lowden opened fire again. His port cannon jammed and the aircraft yawed with the recoil of the starboard gun with each shot. Overcoming this, Lowden shot down a second Zero with three bursts from a range of some 250 yards before targeting a third enemy fighter. Meanwhile Lowden’s wingman, S/Lt Williams, had also shot down a Zero in the first few seconds and now latched onto the fighter targeted by Lowden – between the two Seafires, a fourth Japanese fighter was shot down.
A trio of A6Ms now targeted Lowden. The British pilot hauled his Seafire around into a maximum rate turn, bringing his firepower around to target each of the Zeros as the fighters attempted to turn inside each other. Lowden damaged two of the enemy trio before the speed of all fighters decayed and the Zeros obtained the performance edge. Out of ammunition having shot down two Zeros, shared a third and damaged a further pair, Lowden nosed his Seafire over into a dive seventy degrees below the horizontal, clocking up 425 mph as he retreated from the combat. He was intercepted by US Navy Corsairs on his return journey, but managed to convince them he was not a threat by lowering his wheels and turning sharply to display his wing roundels. Meanwhile S/Lt Murphy, Lowden’s number three, was also locked in a turn fight with a pair of Zeros. He claimed both destroyed.
Back with the Avengers, the four remaining Seafire LIIIs were tied to protecting the torpedo bombers as their priority. Hockley’s wingman, S/Lt Gorvin, was hit by a Zero and had one of his cannon jam as well as his drop tank failing to jettison. The leader of the second pair, S/Lt Kay, set fire to a Zero which was attacking the Avengers before blowing the tail clean off a second Zero with a 60 degree deflection shot, then finally damaging a third enemy fighter before running out of ammunition. His wingman, S/Lt Duncan, also had a jammed cannon, but engaged the Zeros and fired at three, destroying one before escaping by climbing away after running out of ammunition.
Throughout all of this, four Zeros broke through the escort of Seafires and attacked the Avengers. One bomber suffered significant damage but managed to stay in formation, whilst Petty Officer Simpson, the turret gunner, claimed one of the attacking Zeros as probably destroyed after hitting it with several bursts of fire. All six Avengers managed to reach their target and bomb the factory, although the damaged Avenger was forced to ditch alongside one of the carrier’s escorting destroyers on the return journey.
 |
| Supermarine Seafire |
The final tallies for what was very probably the last dogfight of the war were seven aircraft destroyed, three probables and four damaged by the Fleet Air Arm, for the loss of one Seafire and one Avenger ditching after the mission. This has proved difficult to corroborate as Japanese records from the day in question are incomplete in several key areas. The 302nd Kokutai claimed a single kill and two probable for the loss of four, which certainly goes some way to tying in with British accounts. The 252nd Kokutai claimed nine enemy aircraft destroyed and four damaged (although their record of losses is not currently quoted in any accounts), although US Navy VF-88 were also in the area and recorded losing four aircraft for eight claims of their own.
Overclaiming in air combat by all nations was a common and accepted part of the debrief process following the rapid and confusing state of aerial combat. It is certainly very likely that the Seafires of No.24 Wing did encounter Zeros of the 302nd Kokutai, and possibly also elements of the 252nd.
Whilst the accuracy of claims will remain open to debate, the recorded losses show the Seafire as the victor over the Zero in this final clash, despite being outnumbered, at a height disadvantage and tied to an escort. However, the Imperial Japanese Navy was critically short of experienced pilots at this point; the majority of Royal Navy pilots involved in the fight were far from veterans but, with the balance of power having clearly changed by this stage of the war, they had at least been afforded the opportunity for a proper training syllabus, an essential factor which was denied to many if not most of their Japanese adversaries on the day.
The last to land that day was S/Lt Victor Lowden – with his engine overheated and claiming two kills, a third shared and two damaged, Lowden stepped out of the Seafire’s cramped cockpit to find that Japan had surrendered. Barring formalities, the war was finally over.
About The Author
 |
Mark Barber, War Thunder Historical Consultant Mark Barber is a pilot in the British Royal Navy's Fleet Air Arm. His first book was published by Osprey Publishing in 2008; subsequently, he has written several more titles for Osprey and has also published articles for several magazines, including the UK's top selling aviation magazine 'FlyPast'. His main areas of interest are British Naval Aviation in the First and Second World Wars and RAF Fighter Command in the Second World War. He currently works with Gaijin Entertainment as a Historical Consultant, helping to run the Historical Section of the War Thunder forums and heading up the Ace of the Month series. |